Transparent mitmproxy for iPhone using Tailscale in a VM
The other day I was trying to study an iPhone app and the API calls it makes to its servers. In the olden days this used to be pretty straightforward with mitmproxy: you would just set it up on your computer on the same network, and point your phone’s proxy to that computer. However, these days apps have gotten wiser (with certificate pinning) and less conformant (by bypassing proxies). This post is about the latter, and I will hopefully get around to writing about some more mitmproxy stuff on how I managed to get around the former in another post later on. (Spoiler: there’s no magic involved, the devs had implemented certificate pinning wrong, when implemented correctly it’s quite non-trivial to get around on iOS).
In this post I’ll document how I managed to force an iPhone (running some iOS 14) to transparently proxy traffic through a Ubuntu VM running mitmproxy, which in effect allows you to inspect the majority of traffic flowing through your phone even if they are encrypted with TLS.
I normally write about strictly open-source stuff, but Tailscale is actually phenomenal in making wireguard setup easier, so I’m using it here (I’ve no relationship with Tailscale).
Overview
The idea is as follows:
- run a transparent mitmproxy on a Ubuntu machine
- force traffic from the iPhone to the Ubuntu machine through a wireguard VPN (in this case Tailscale)
- use iptables to get traffic from the VPN through the mitmproxy
Setting up a Ubuntu VM
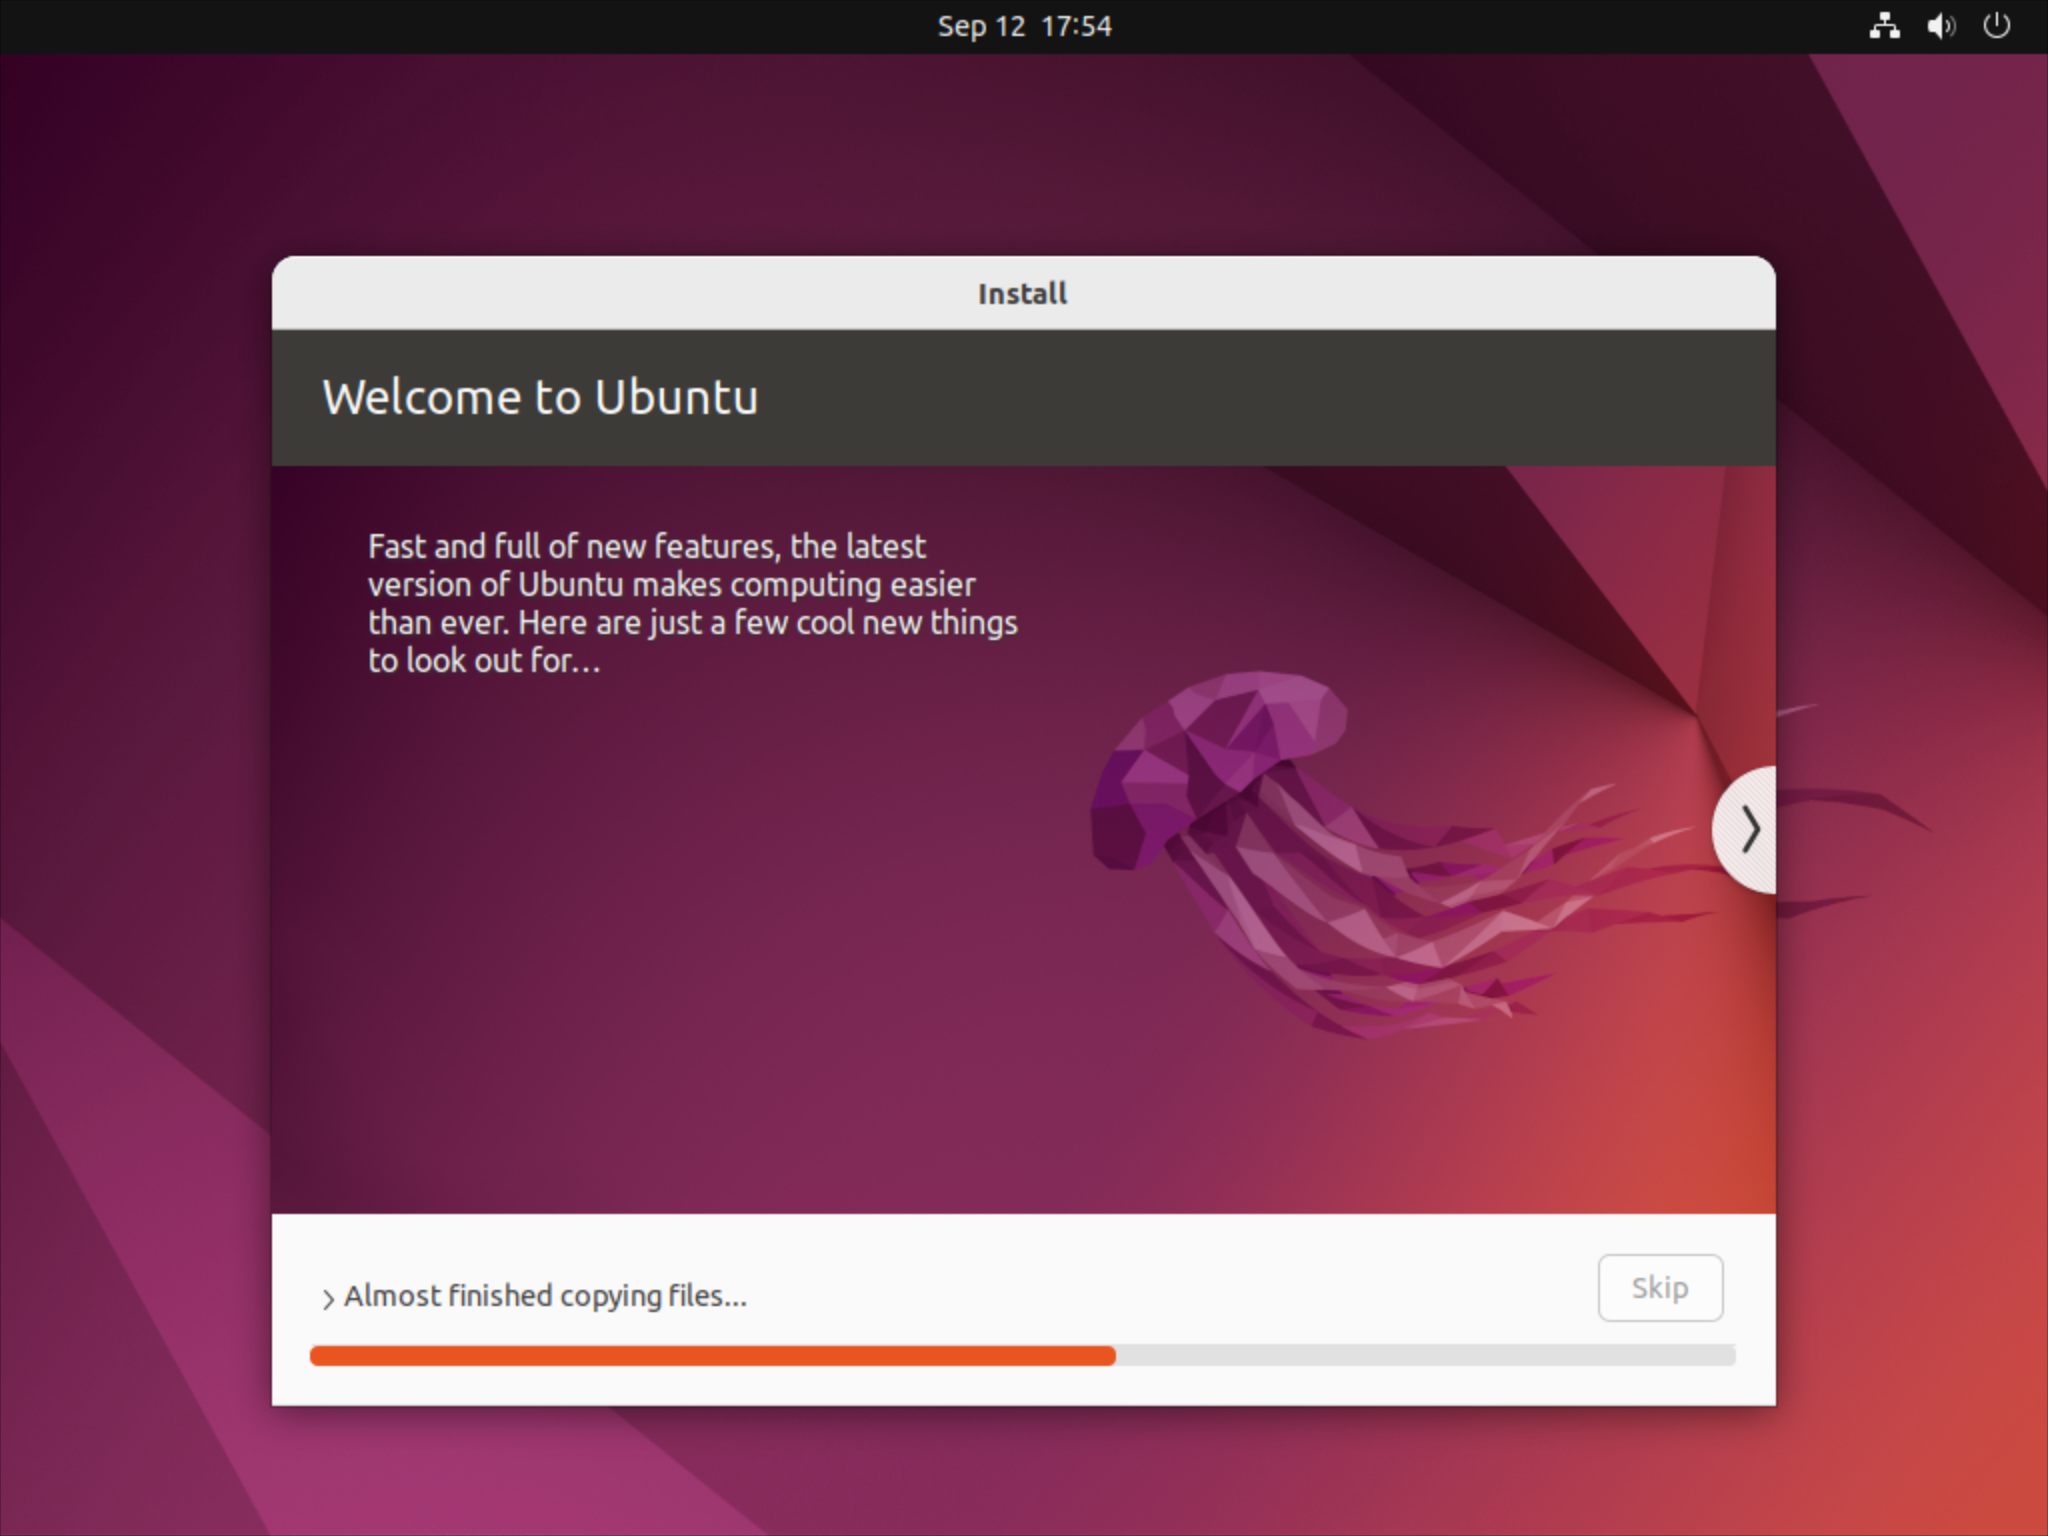
I downloaded the Ubuntu 22.04 installation media directly from Ubuntu. I’m using a (graphical) desktop Ubuntu installation (in contrast to the usual AWS server setup) because I find the mitmweb command much nicer than the command line version.
I run my local VMs with QEMU/KVM using virt-manager. You can basically just click through everything without much config as it’s a throwaway install. Just remember your password.
Installing mitmproxy
Once you’re in your Ubuntu VM, start by installing mitmproxy:
mkdir ~/mitmproxy
cd ~/mitmproxy
wget https://snapshots.mitmproxy.org/8.1.1/mitmproxy-8.1.1-linux.tar.gz
tar xf mitmproxy-8.1.1-linux.tar.gz
Installing Tailscale
You’ll have to sign up for Tailscale, which you can figure out.
Now to install Tailscale you can follow the instructions on their install page, short, naughty version here:
sudo apt update
sudo apt install -y curl
curl -fsSL https://tailscale.com/install.sh | sh
Then start Tailscale and advertise as an exit node (so you can route traffic from your phone through this machine):
sudo tailscale up --advertise-exit-node
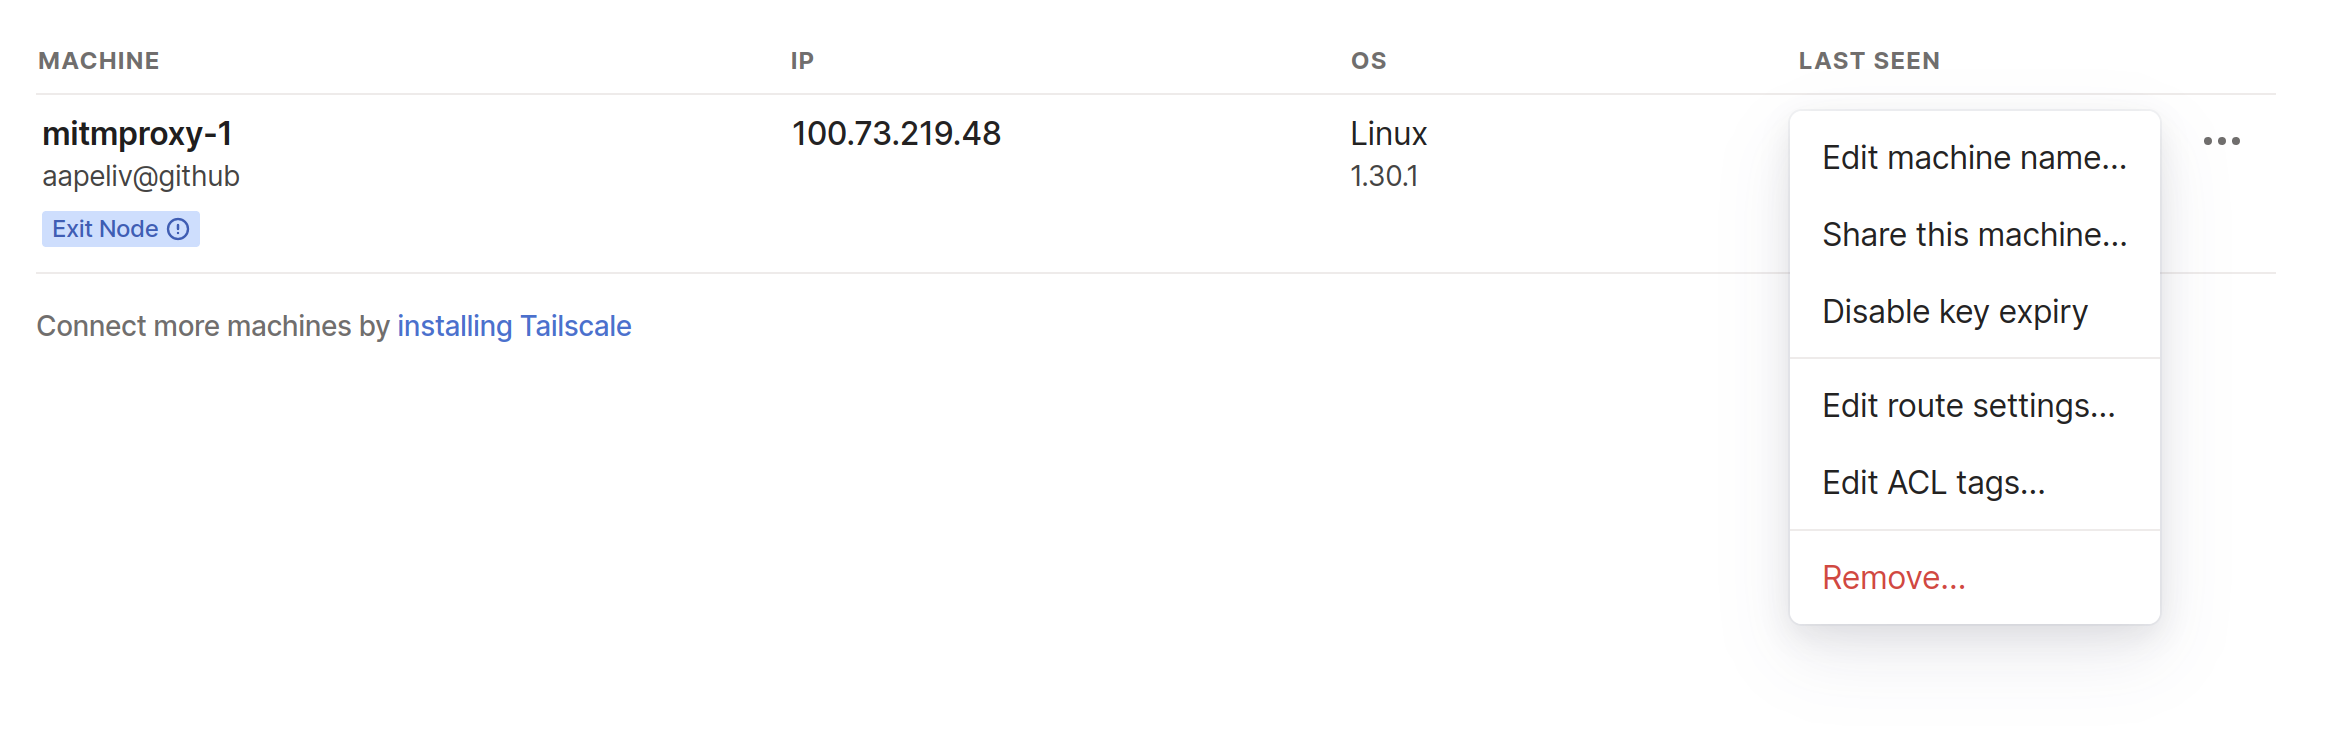
It’ll give you a url to log into to add the VM to your network, so go there and authorize it.
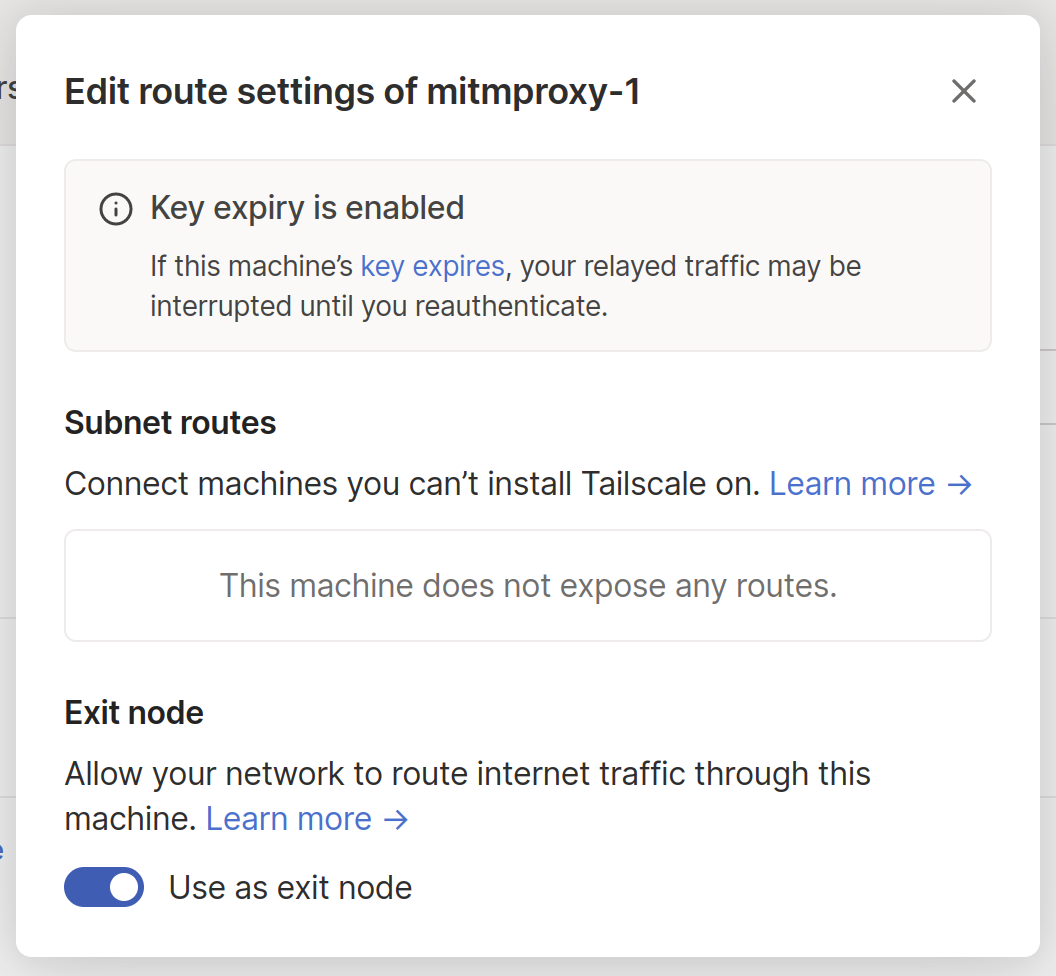
After that you’ll want to go to the Tailscale admin console and enable the exit node there, by finding the machine, clicking on the settings and “edit route settings” then turning on the “exit node” mode. I guess it doesn’t straight up allow it without turning it on in the admin settings for safety or something.
Redirecting traffic from Tailscale to mitmproxy
Enable packet rewriting:
sudo sysctl -w net.ipv4.ip_forward=1
sudo sysctl -w net.ipv6.conf.all.forwarding=1
Then redirect packets from Tailscale to the transparent proxy with iptables:
sudo iptables -t nat -A PREROUTING -i tailscale0 -p tcp --dport 80 -j REDIRECT --to-port 8080
sudo iptables -t nat -A PREROUTING -i tailscale0 -p tcp --dport 443 -j REDIRECT --to-port 8080
sudo ip6tables -t nat -A PREROUTING -i tailscale0 -p tcp --dport 80 -j REDIRECT --to-port 8080
sudo ip6tables -t nat -A PREROUTING -i tailscale0 -p tcp --dport 443 -j REDIRECT --to-port 8080
Starting mitmproxy
Now you’re ready to fire up mitmproxy:
./mitmproxy --mode transparent
This will fire up a browser with the mitmproxy web interface waiting for your phone to connect.
Leave this running on the Ubuntu VM while you set up your phone.
Connecting your device to the proxy
I’m doing this on an iPhone but it probably works on any device that you can set up Tailscale on, so androids probably work too, etc.
Once you’ve got the Ubuntu VM set up, go ahead and download the Tailscale app and sign into the same account as you set up for the VM. Then click on the three dots on the top right corner and select “Use exit node…”, and choose your mitmproxy machine.
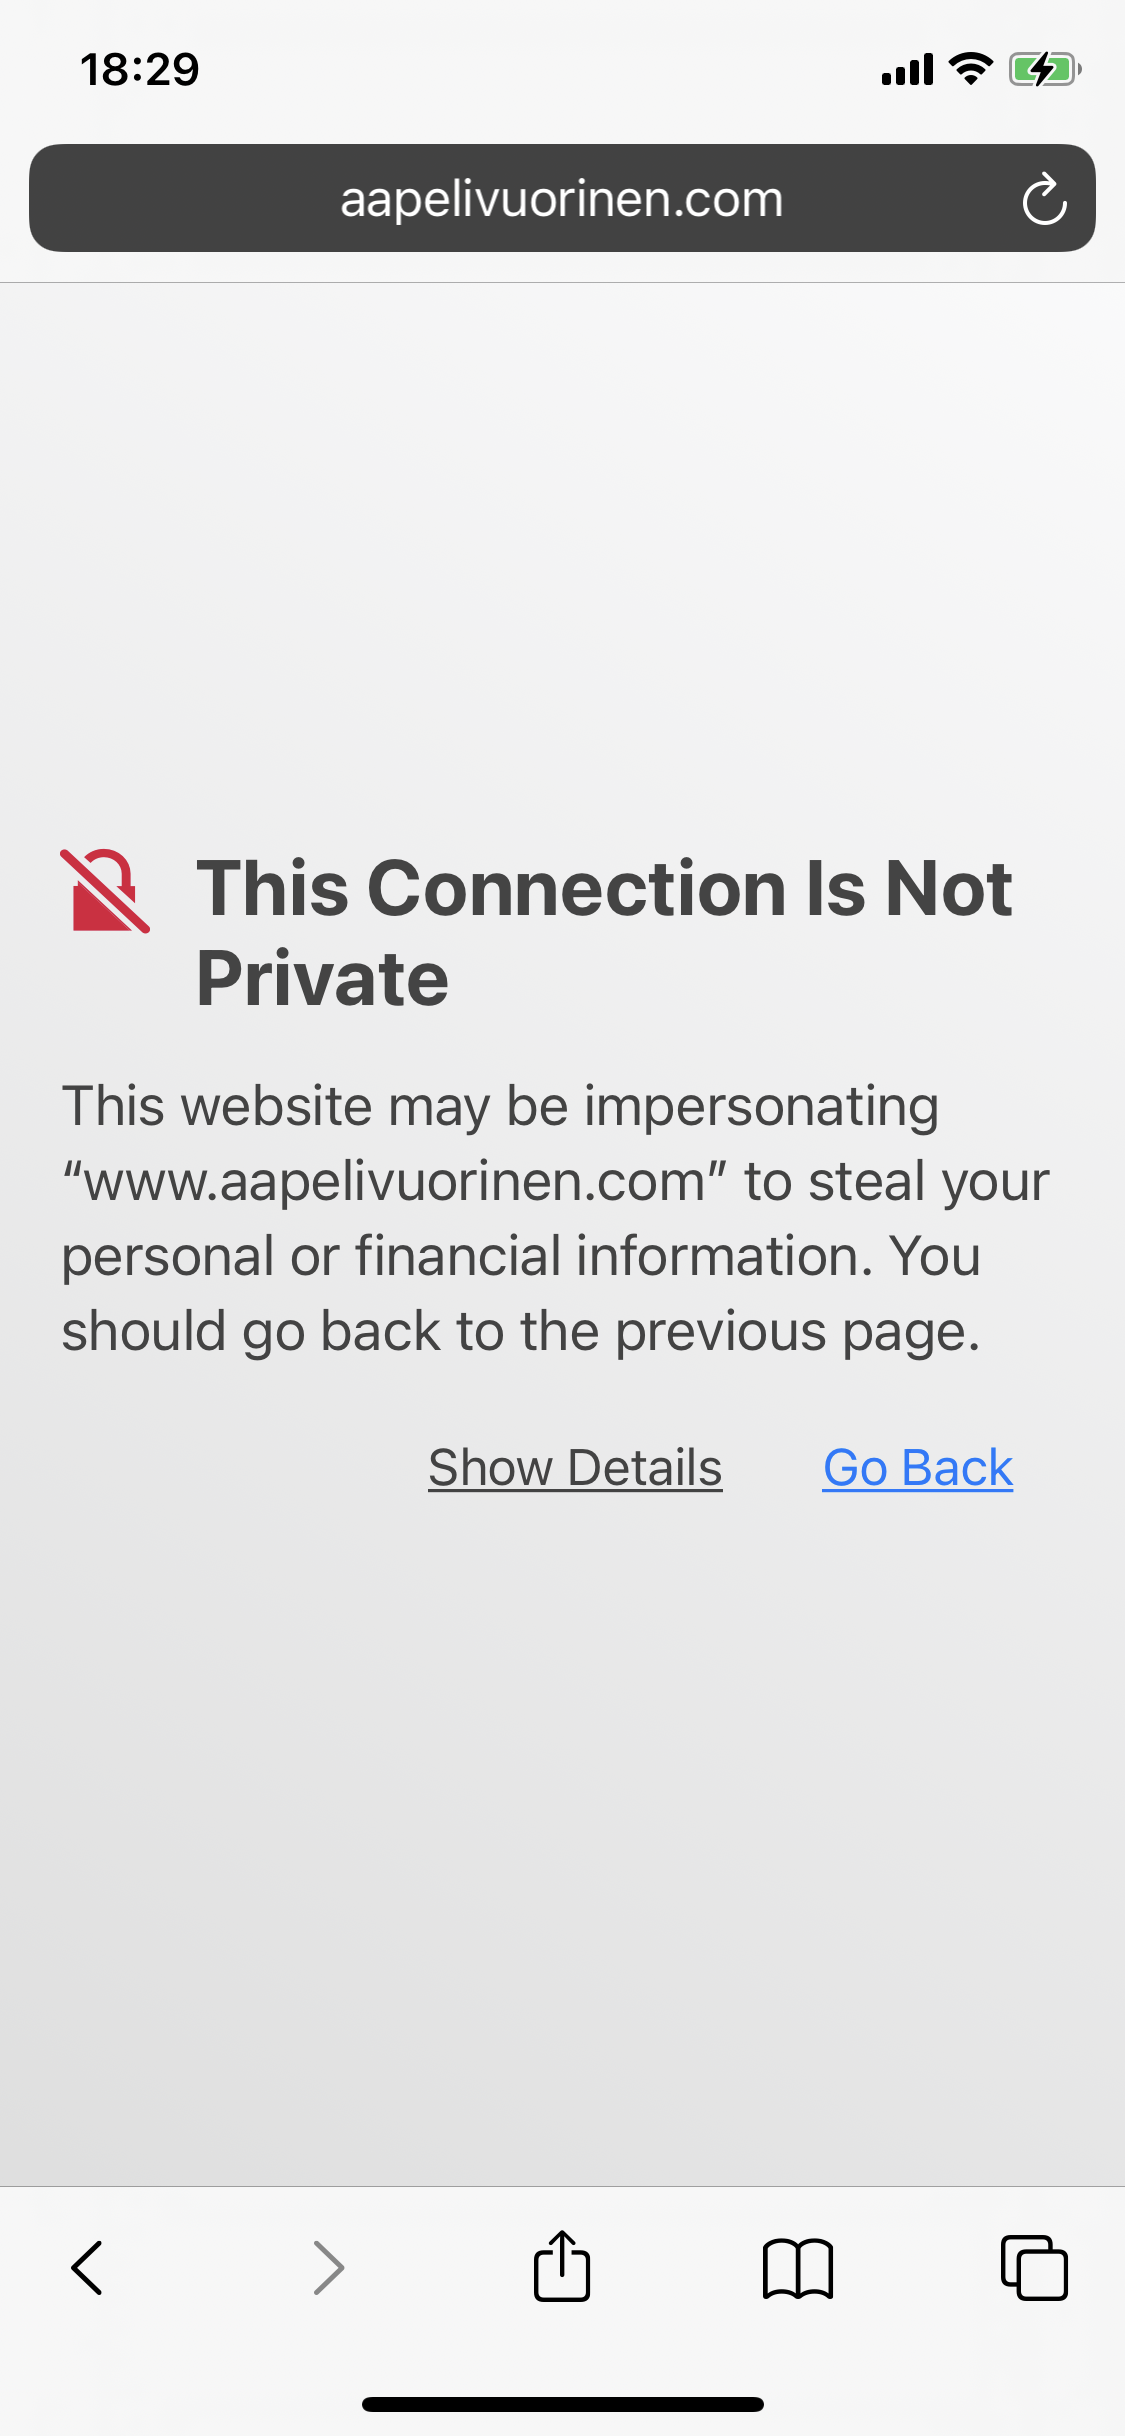
If you now open a private tab and go to some website, you should see the following warning screen about an untrusted certificate. This means you’re connected to the proxy and you’ve connected everything up until now.
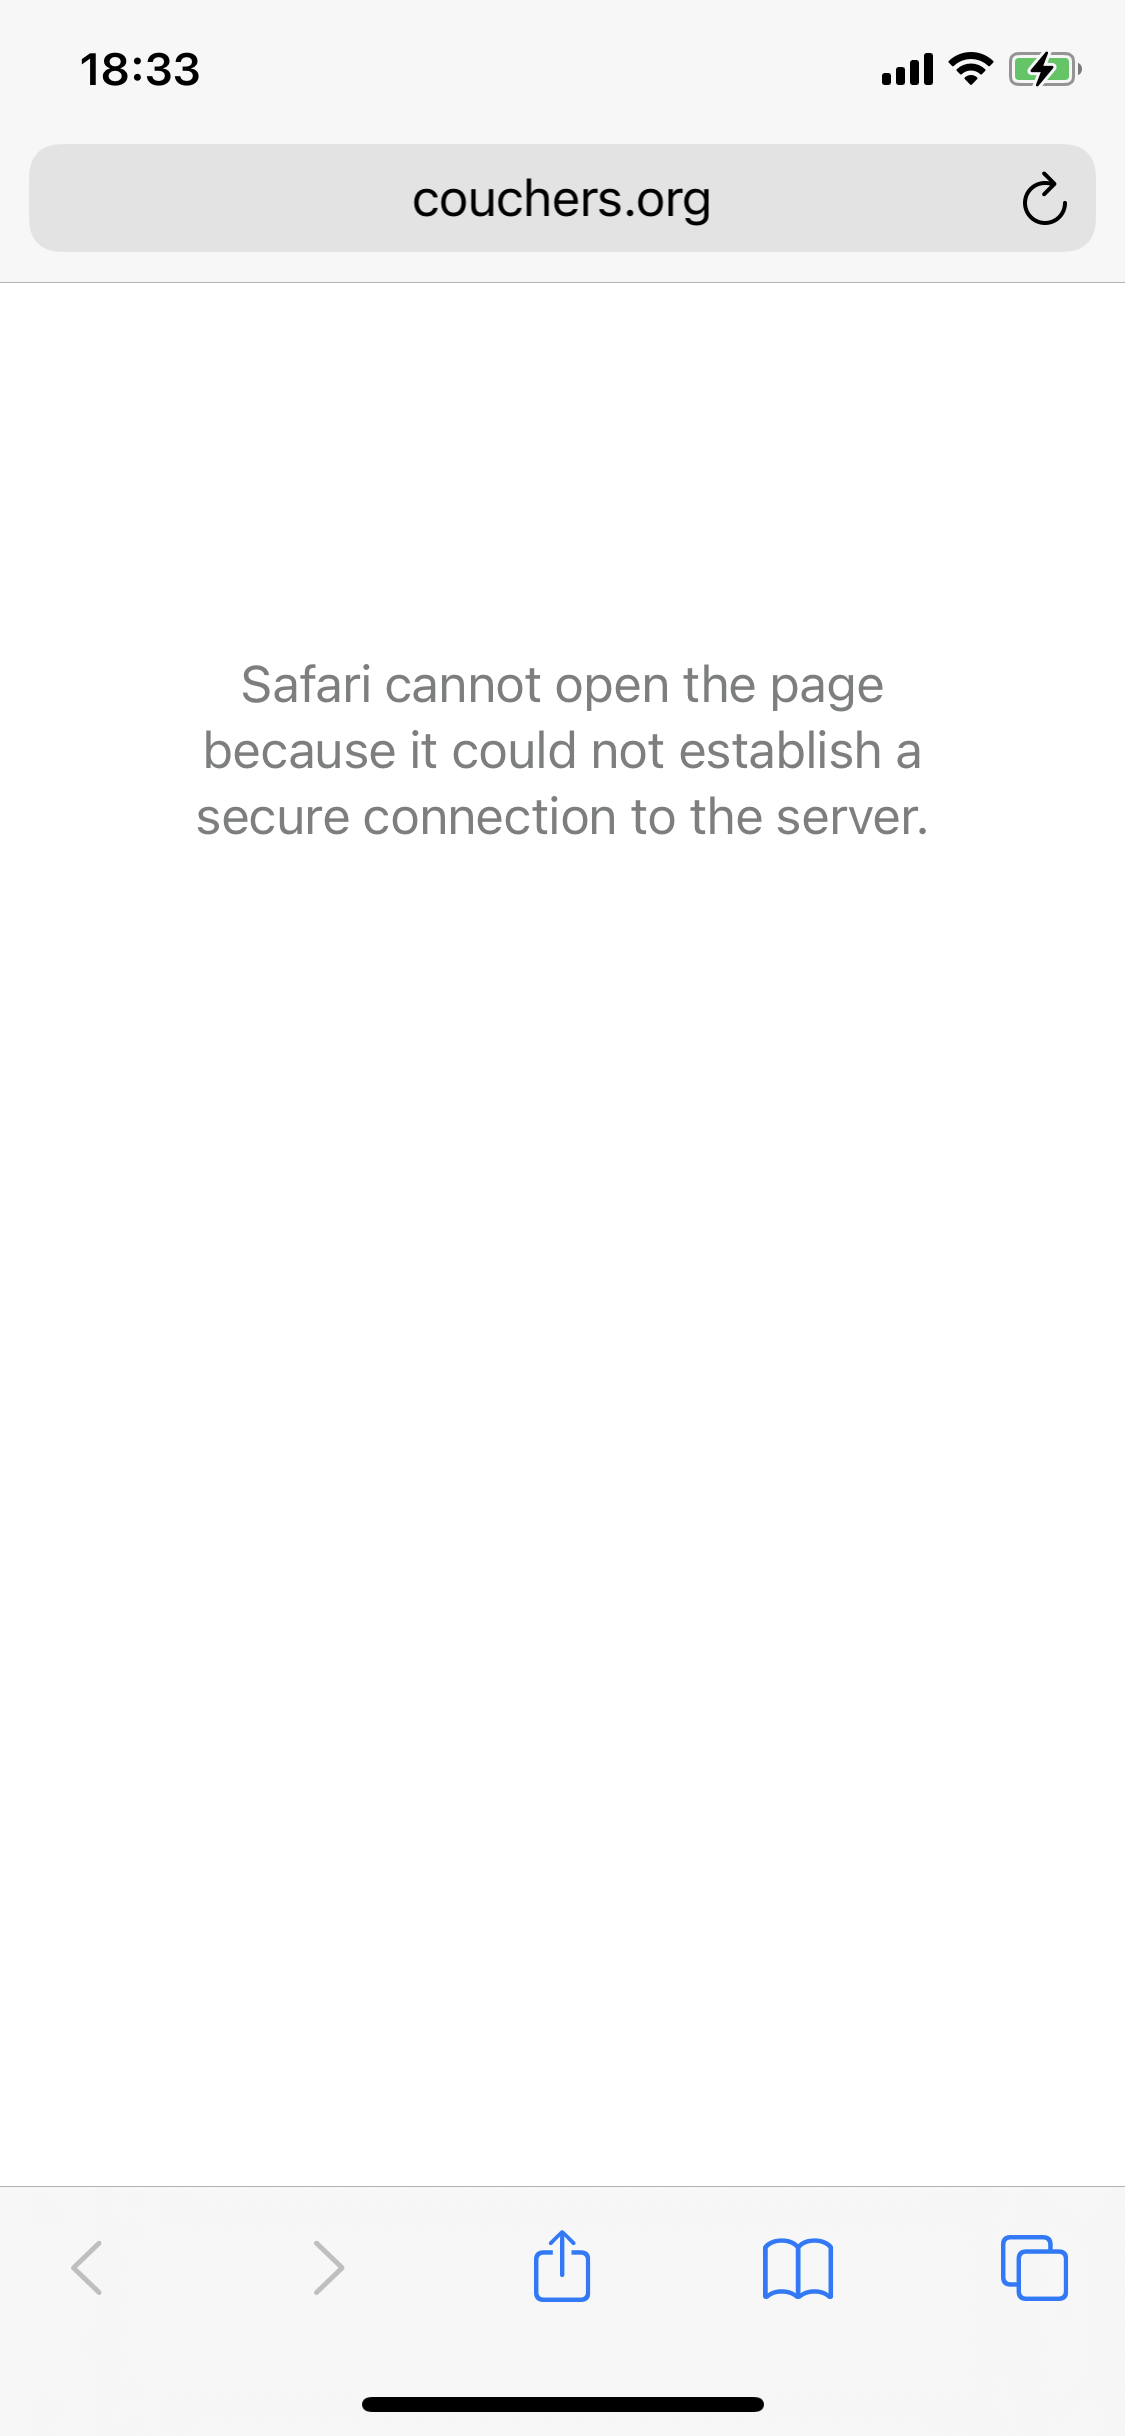
If you see the following screen you probably didn’t do it in a private tab. This is (presumably) because you’re visiting a website you’ve been to before and that has HTTP Strict Transport Security (HSTS) correctly configured and Safari is rightly refusing to even entertain the idea of connecting to such a site. However, even HSTS can leak private information (you previously visited the site!), so Safari rightfully ignores this when you visit in a private tab. (Unfortunately a site set up through AWS S3 and Cloudfront makes it difficult to set the right headers so this site currently doesn’t have HSTS set up.)
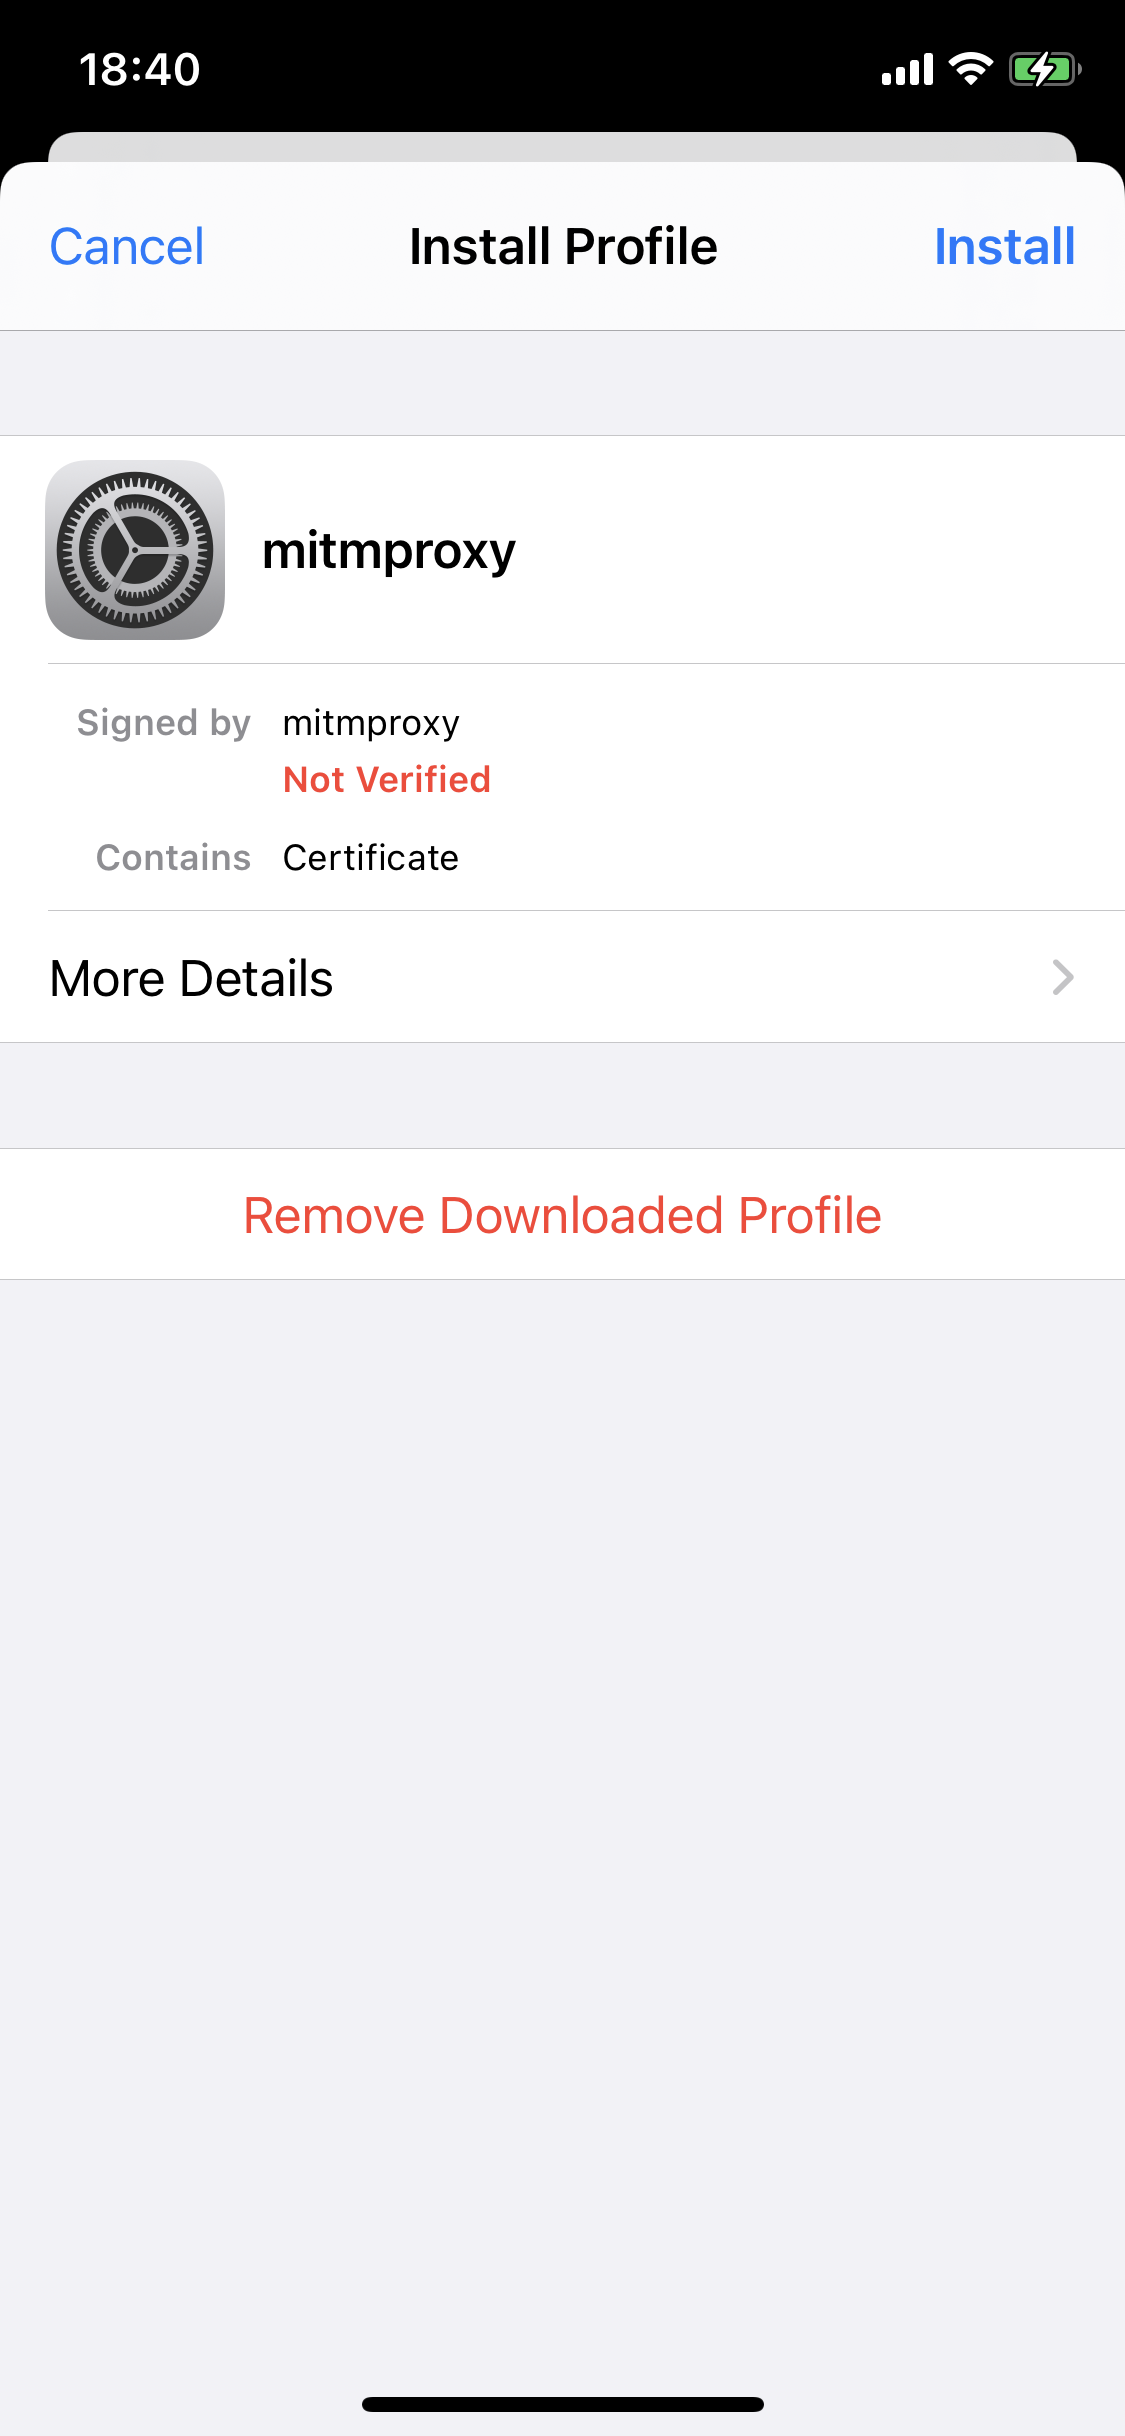
Adding the mitmproxy certificate
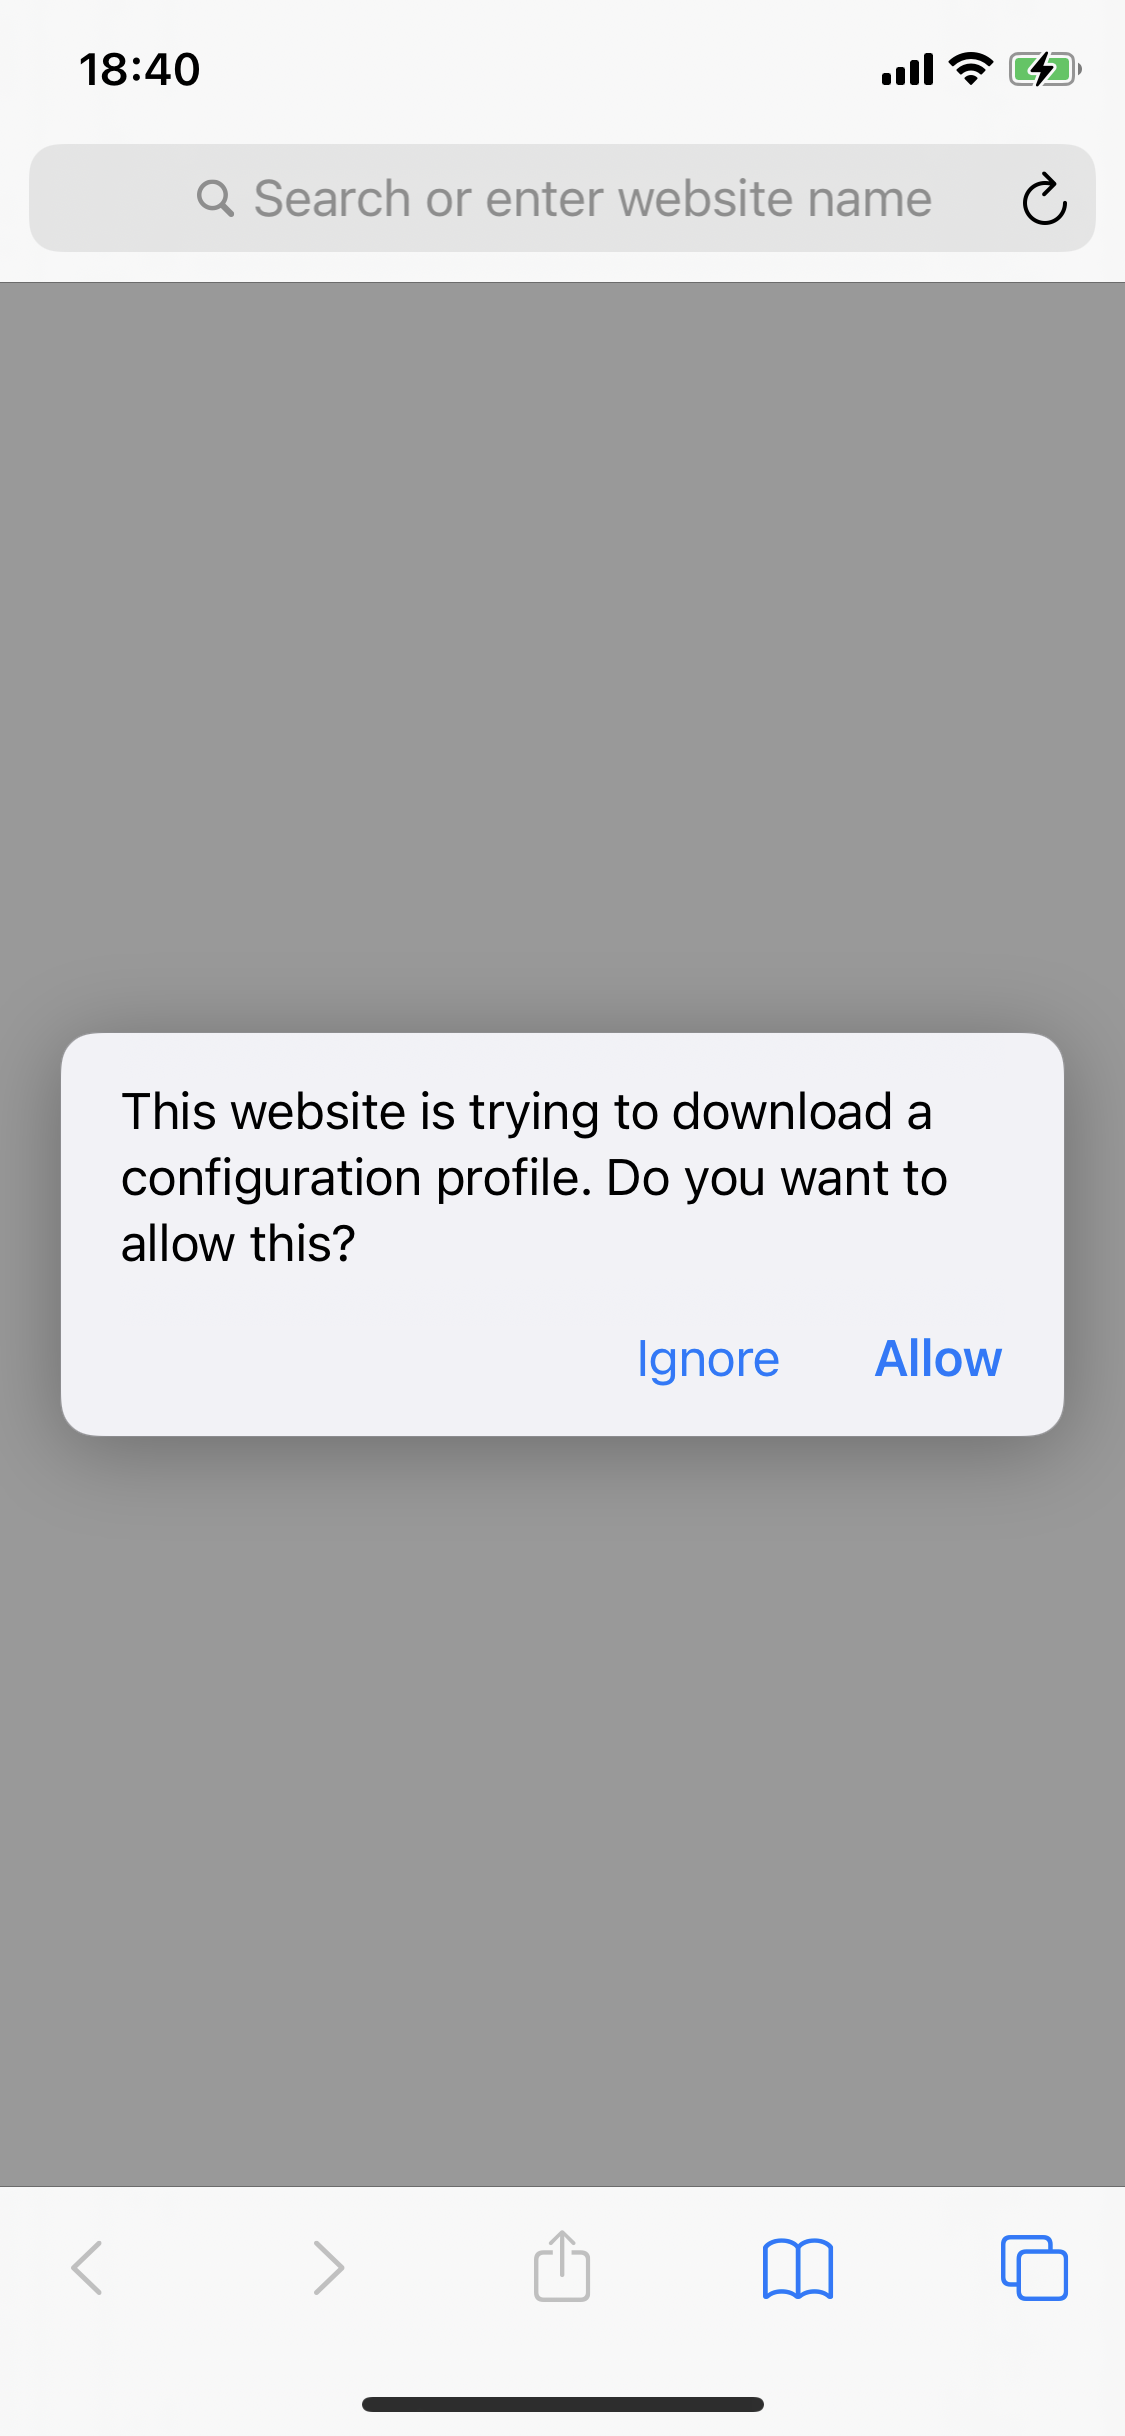
Now open http://mitm.it in Safari on your phone, which will show you the following screen to install the mitmproxy certificate.

Click on “Get mitmproxy-ca-cert.pem”, and install the certificate.
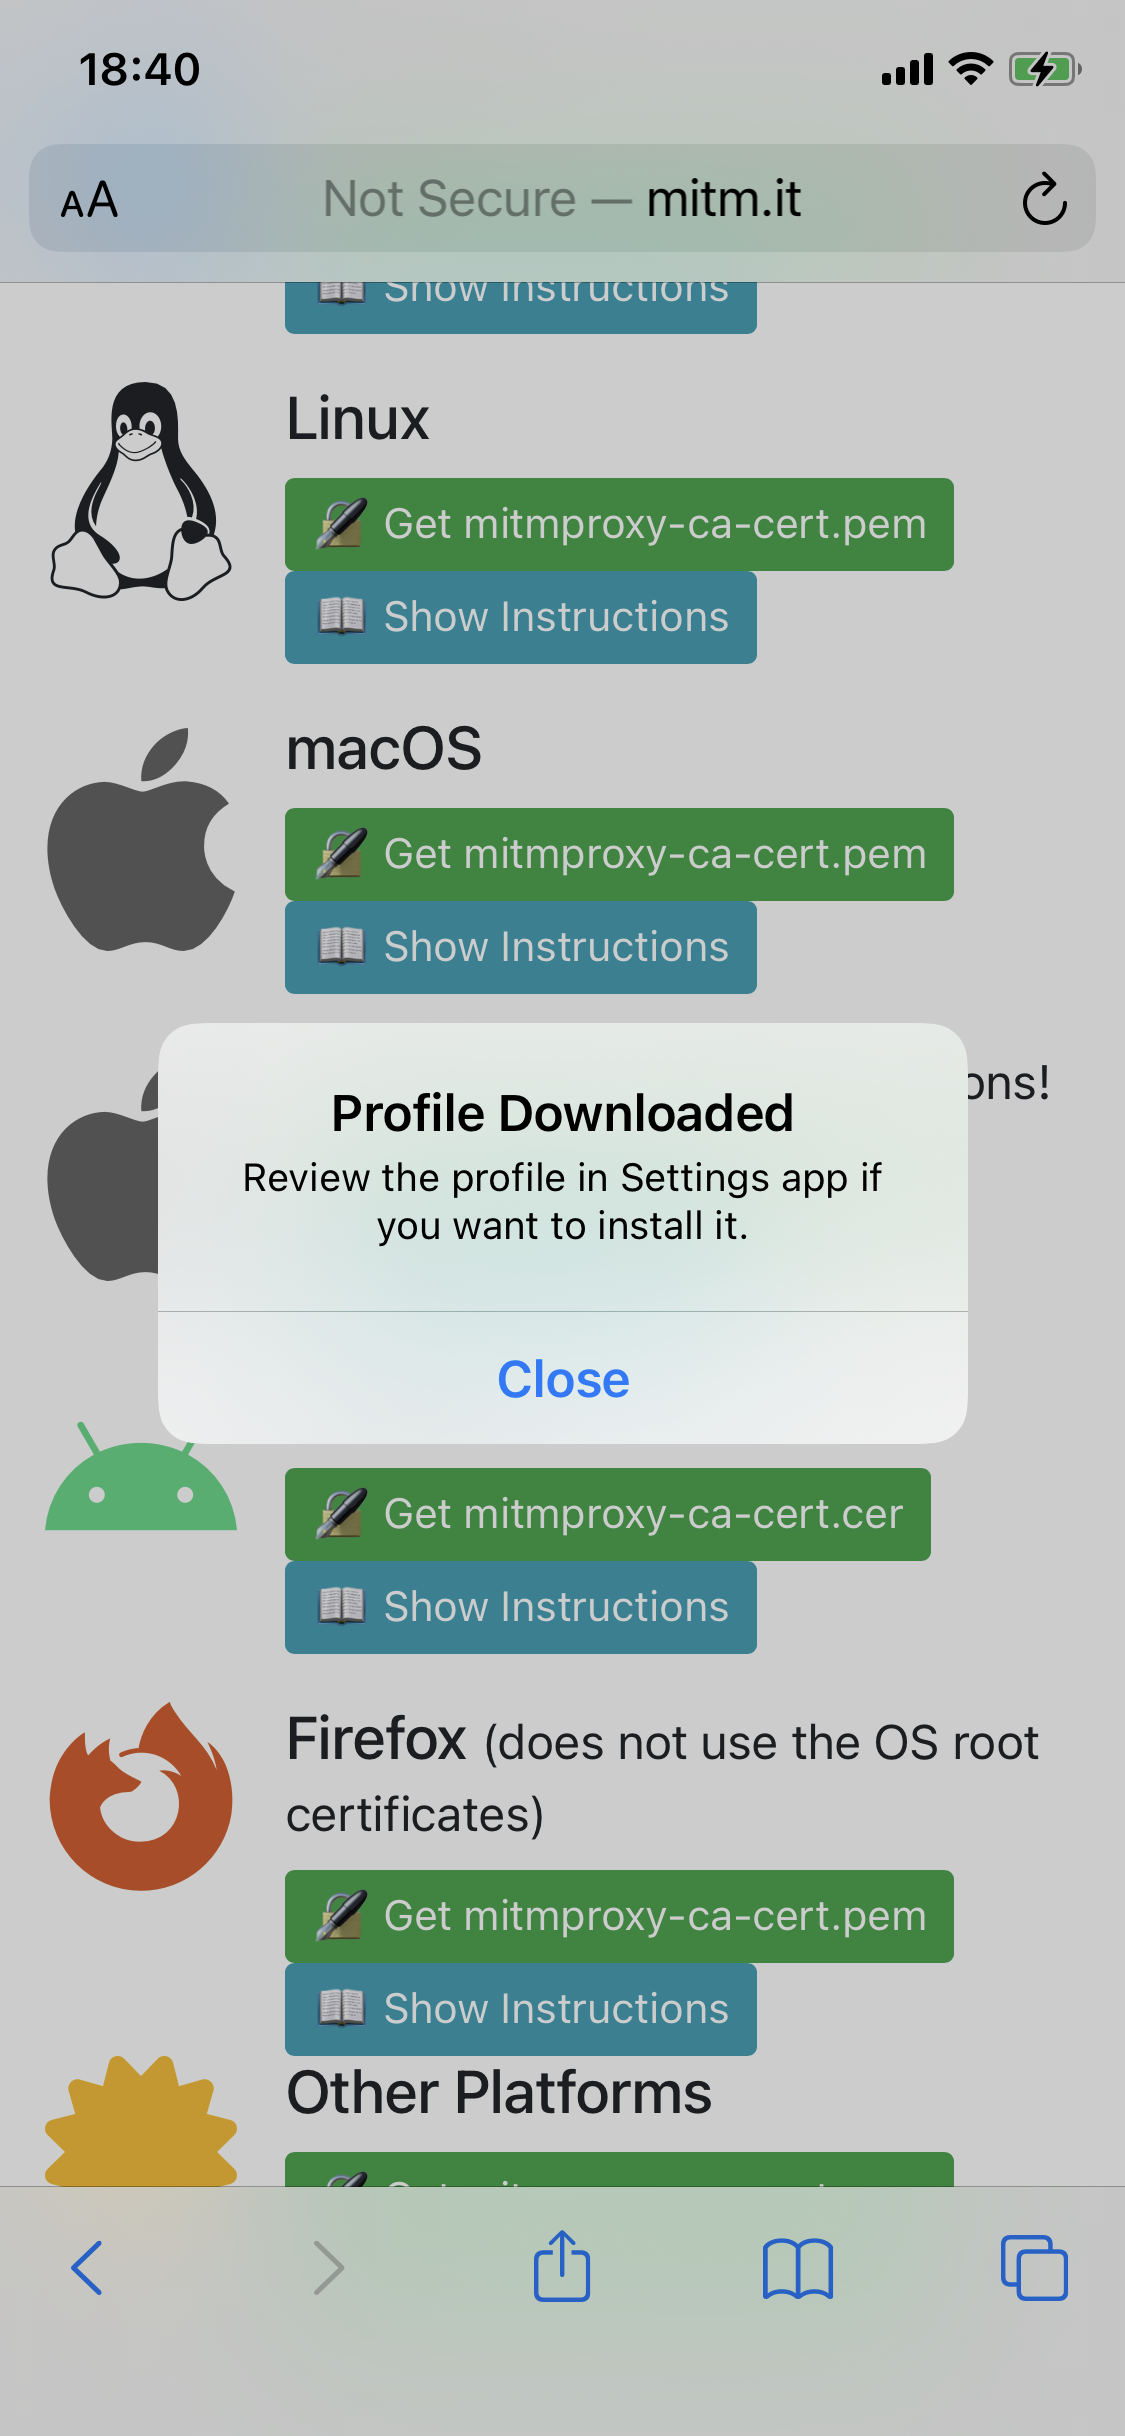
Now go to settings and click on the “Profile Downloaded” button that has appeared at the very top.
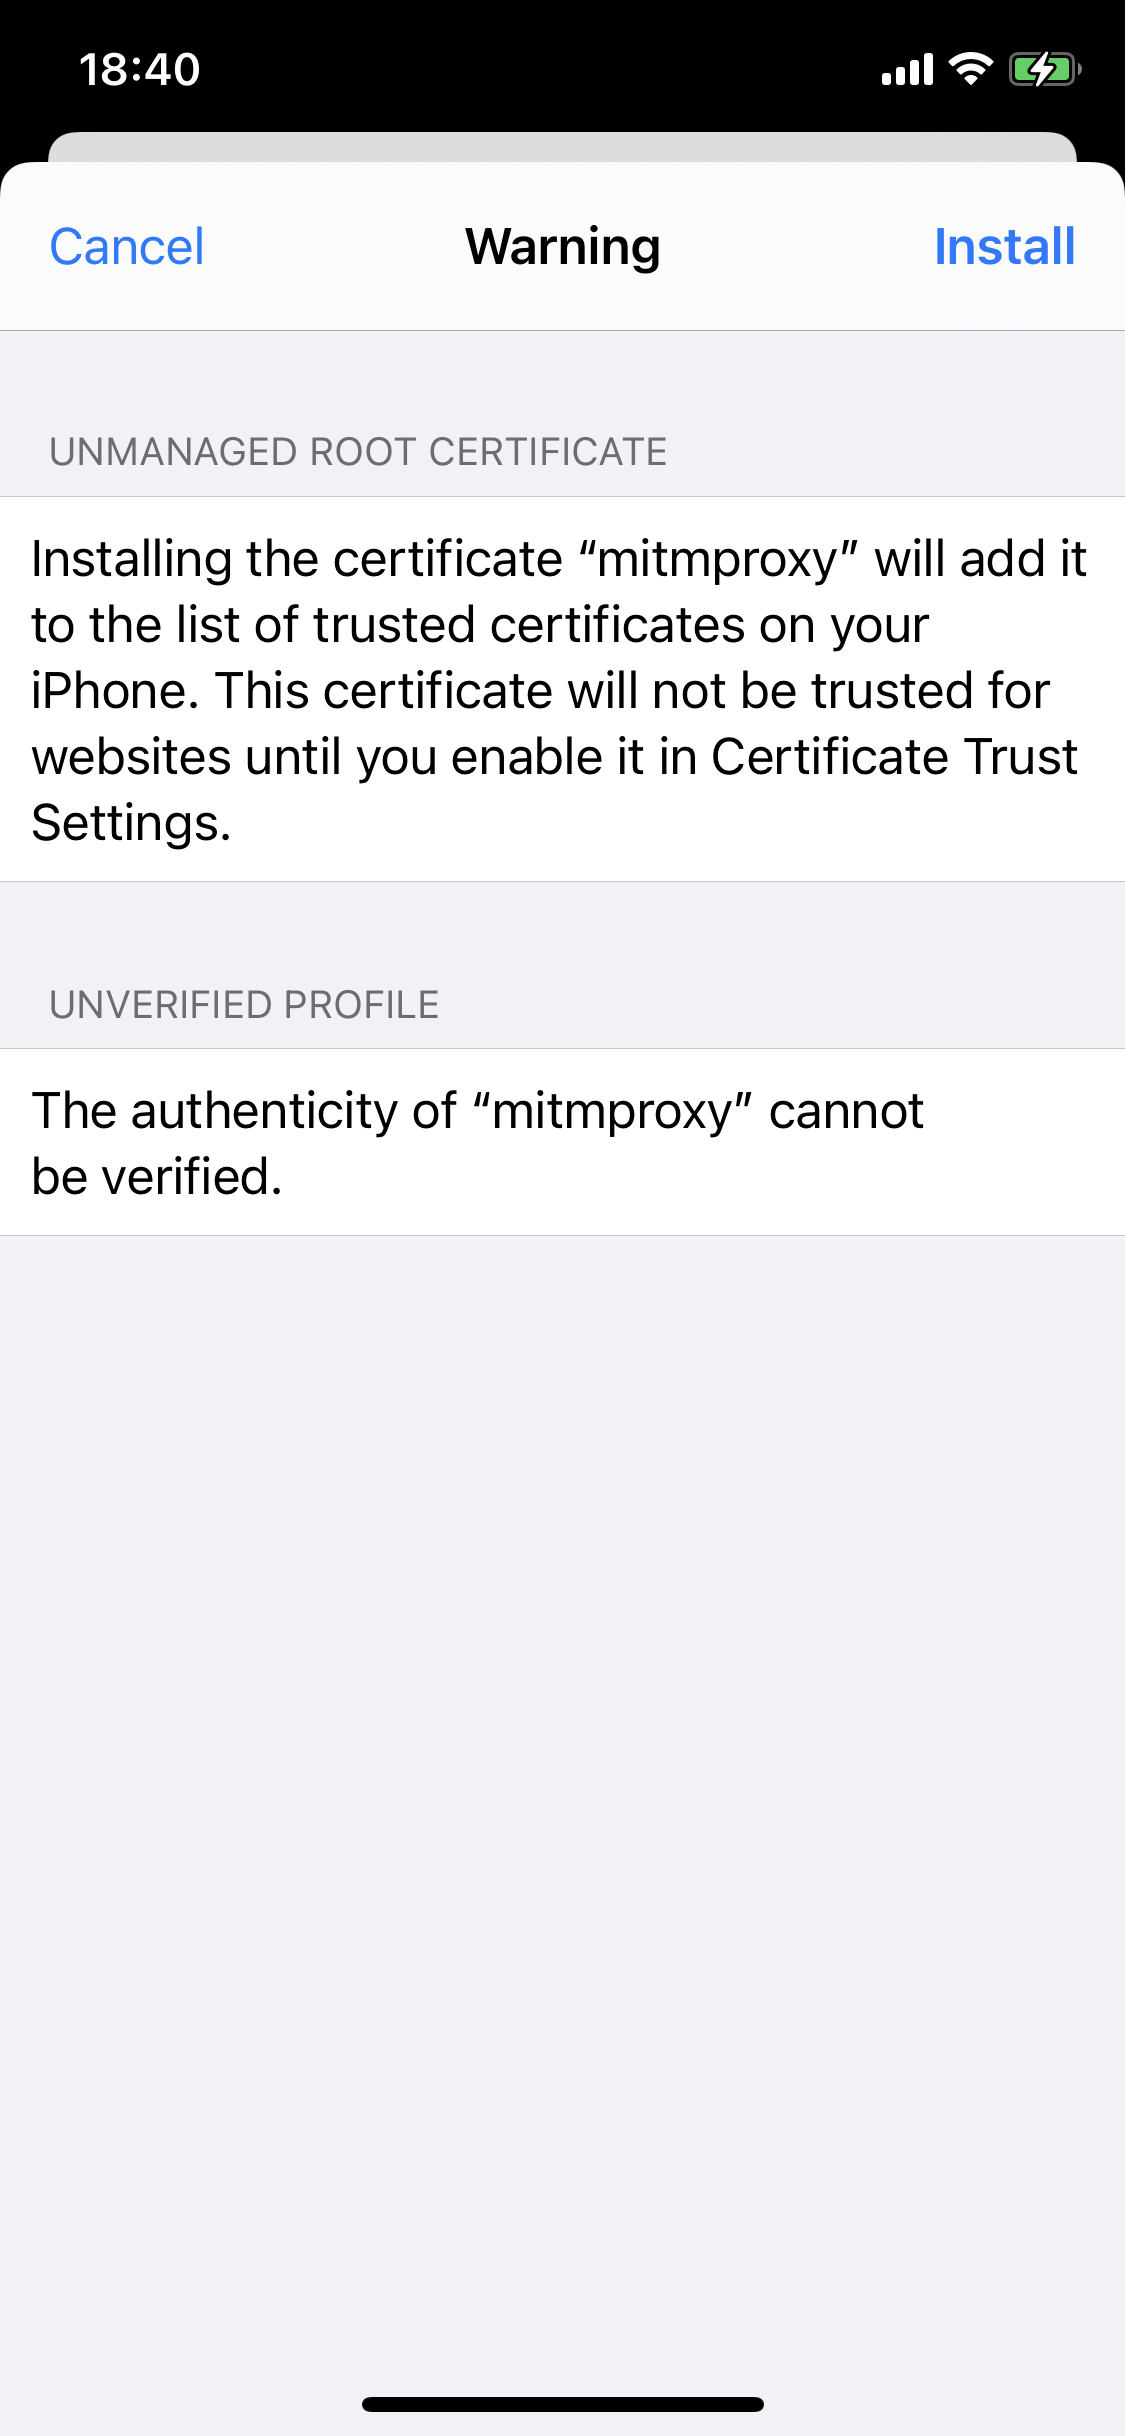
One final step is that you’ll have to go Settings > General > About > Certificate Trust Settings and turn on “Enable full trust for root certificates” for “mitmproxy”.
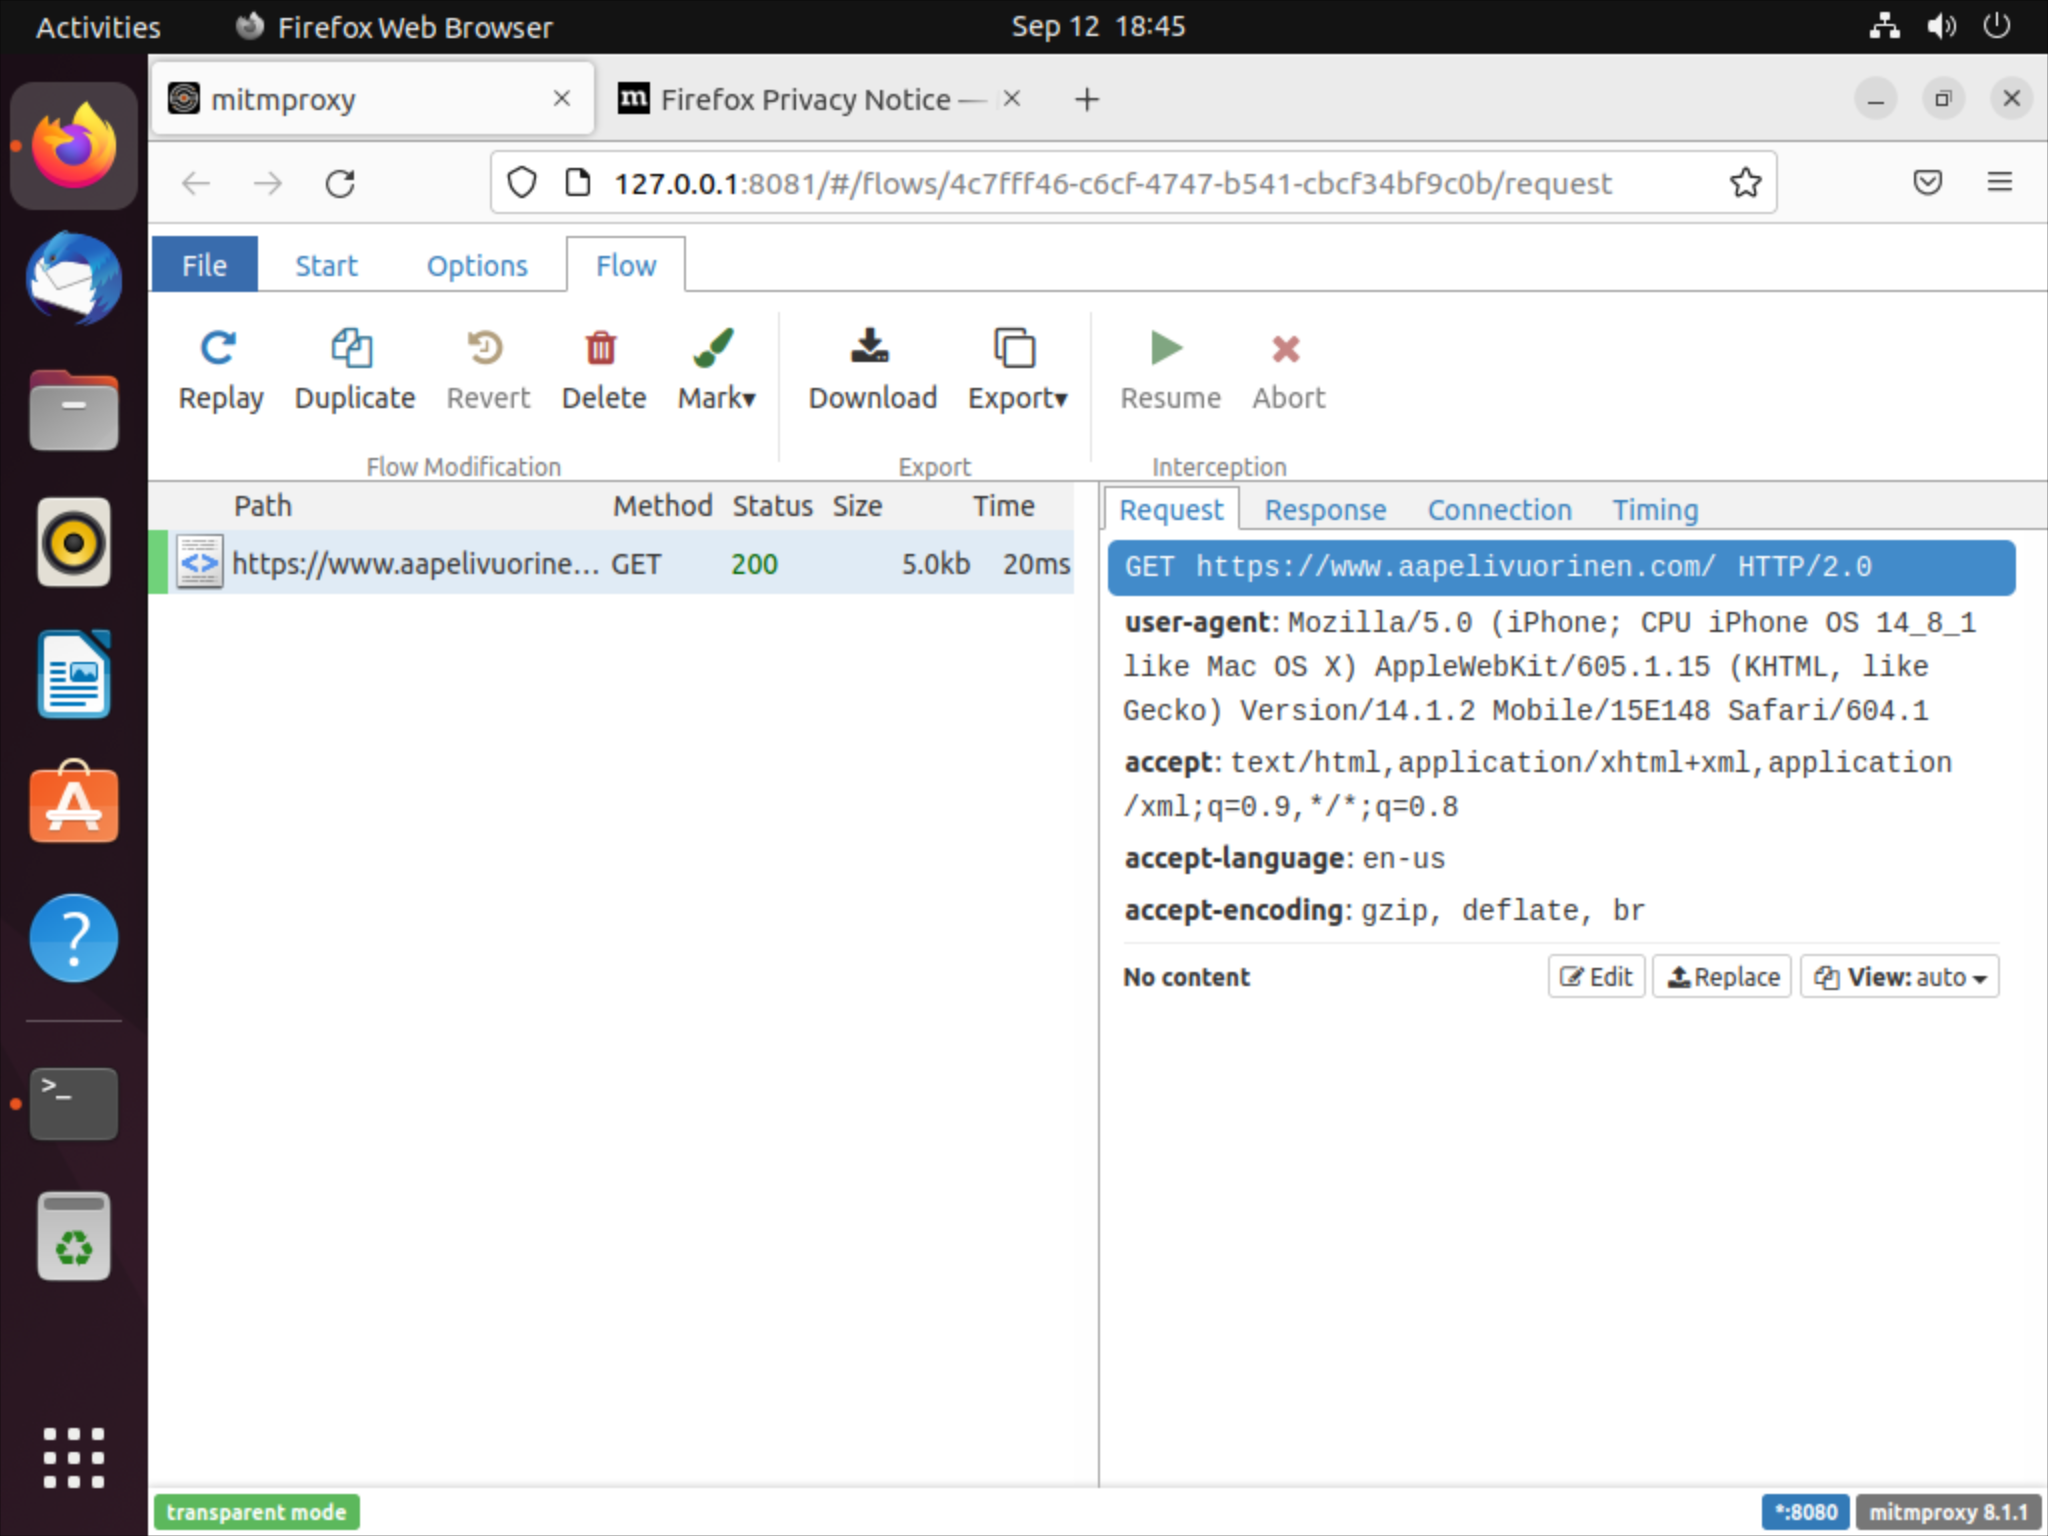
When you now visit your favorite website in Safari, you should be able to inspect the traffic in the Ubuntu VM.
Next steps
You should now be able to see most encrypted traffic flowing out of your iPhone and inspect the majority of app traffic too, though certificate pinning is becoming more common and making this rarer and rarer (which is good!).