
Bypassing Bad Certificate Pinning using mitmproxy
In the last post I wrote about how to set up a transparent mitmproxy for iPhone using a VM and Tailscale, this post continues from that to show how I managed to bypass a broken implementation of certificate pinning in one particular app.
Certificate pinning?
Certificate pinning, also known as SSL pinning, is a modern security feature in mobile apps that helps you secure the connection between the app and the servers it communicates with. The basic idea is that you either check that the certificates used by your API servers are in a list of allowed ones, or you at least check they were issued by a certificate authority that you expect to issue them. There’s more nuance to it, of course (if you’re going to take security into your own hands, some say you should just set up your own Public Key Infrastructure?), but it’s a pretty straightforward way of stopping a rogue Root Certificate Authority from creating bogus certificates and intercepting allegedly encrypted traffic without too much hassle. I’ve heard of some “antivirus” software or some corporate dragnets doing something sketchy like trying to decrypt all communication, so it’s got its uses. There are other ways of doing this, like requiring Certificate Transparency, etc; but this post is about certificate pinning.
If you implement it correctly: by for instance embedding the expected sha256-pin value in your app, it can be tricky to circumvent it without modifying the binary itself, which is notoriously hard on a recent iPhone (it seems you need a jailbroken one).
The basic idea
I first set up mitmproxy and started looking for traffic, only to find out that the app had certificate pinning in place. At first I was dismayed and thought my reverse engineering was over, but then I noticed a singular request at app launch that looked something like this:
$ curl https://app-api.example.com/v2/tls-pin-setup
> GET /v2/tls-pin-setup HTTP/1.1
> Host: app-api.example.com
>
< HTTP/1.0 200 OK
< Content-type: application/json
<
{"tls_certificate_sha256_pins": ["v55lxgINs0A4/XURP5K8fTSewJc7S1CusvkOObVVNAQ=", "wOCUmHaXqao/7La+XijYP2yTZzspExLADro/tyifUKo="]}
A flicker of hope! Clearly the app was requesting from the server info on which TLS certificates to accept before actually enforcing it.
This meant if I intercepted this initial request and replaced these with the hashes of my own certificates signed by the mitmproxy CA, I could probably get the app to happily go through the proxy and hence decrypt all the traffic?
Generating and signing a leaf certificate
When you set up mitmproxy, it generates a unique root CA that you then install and trust on your device (in this case an iPhone). mitmproxy then automatically generates certificates and signs them on the fly.
mitmproxy has an extensible scripting system, and is supposed to have the mitmcert property deep inside the HTTP “flow” that you’re supposed to be able to access, however, unfortunately it seems to be broken. So we better make our own certificates instead.
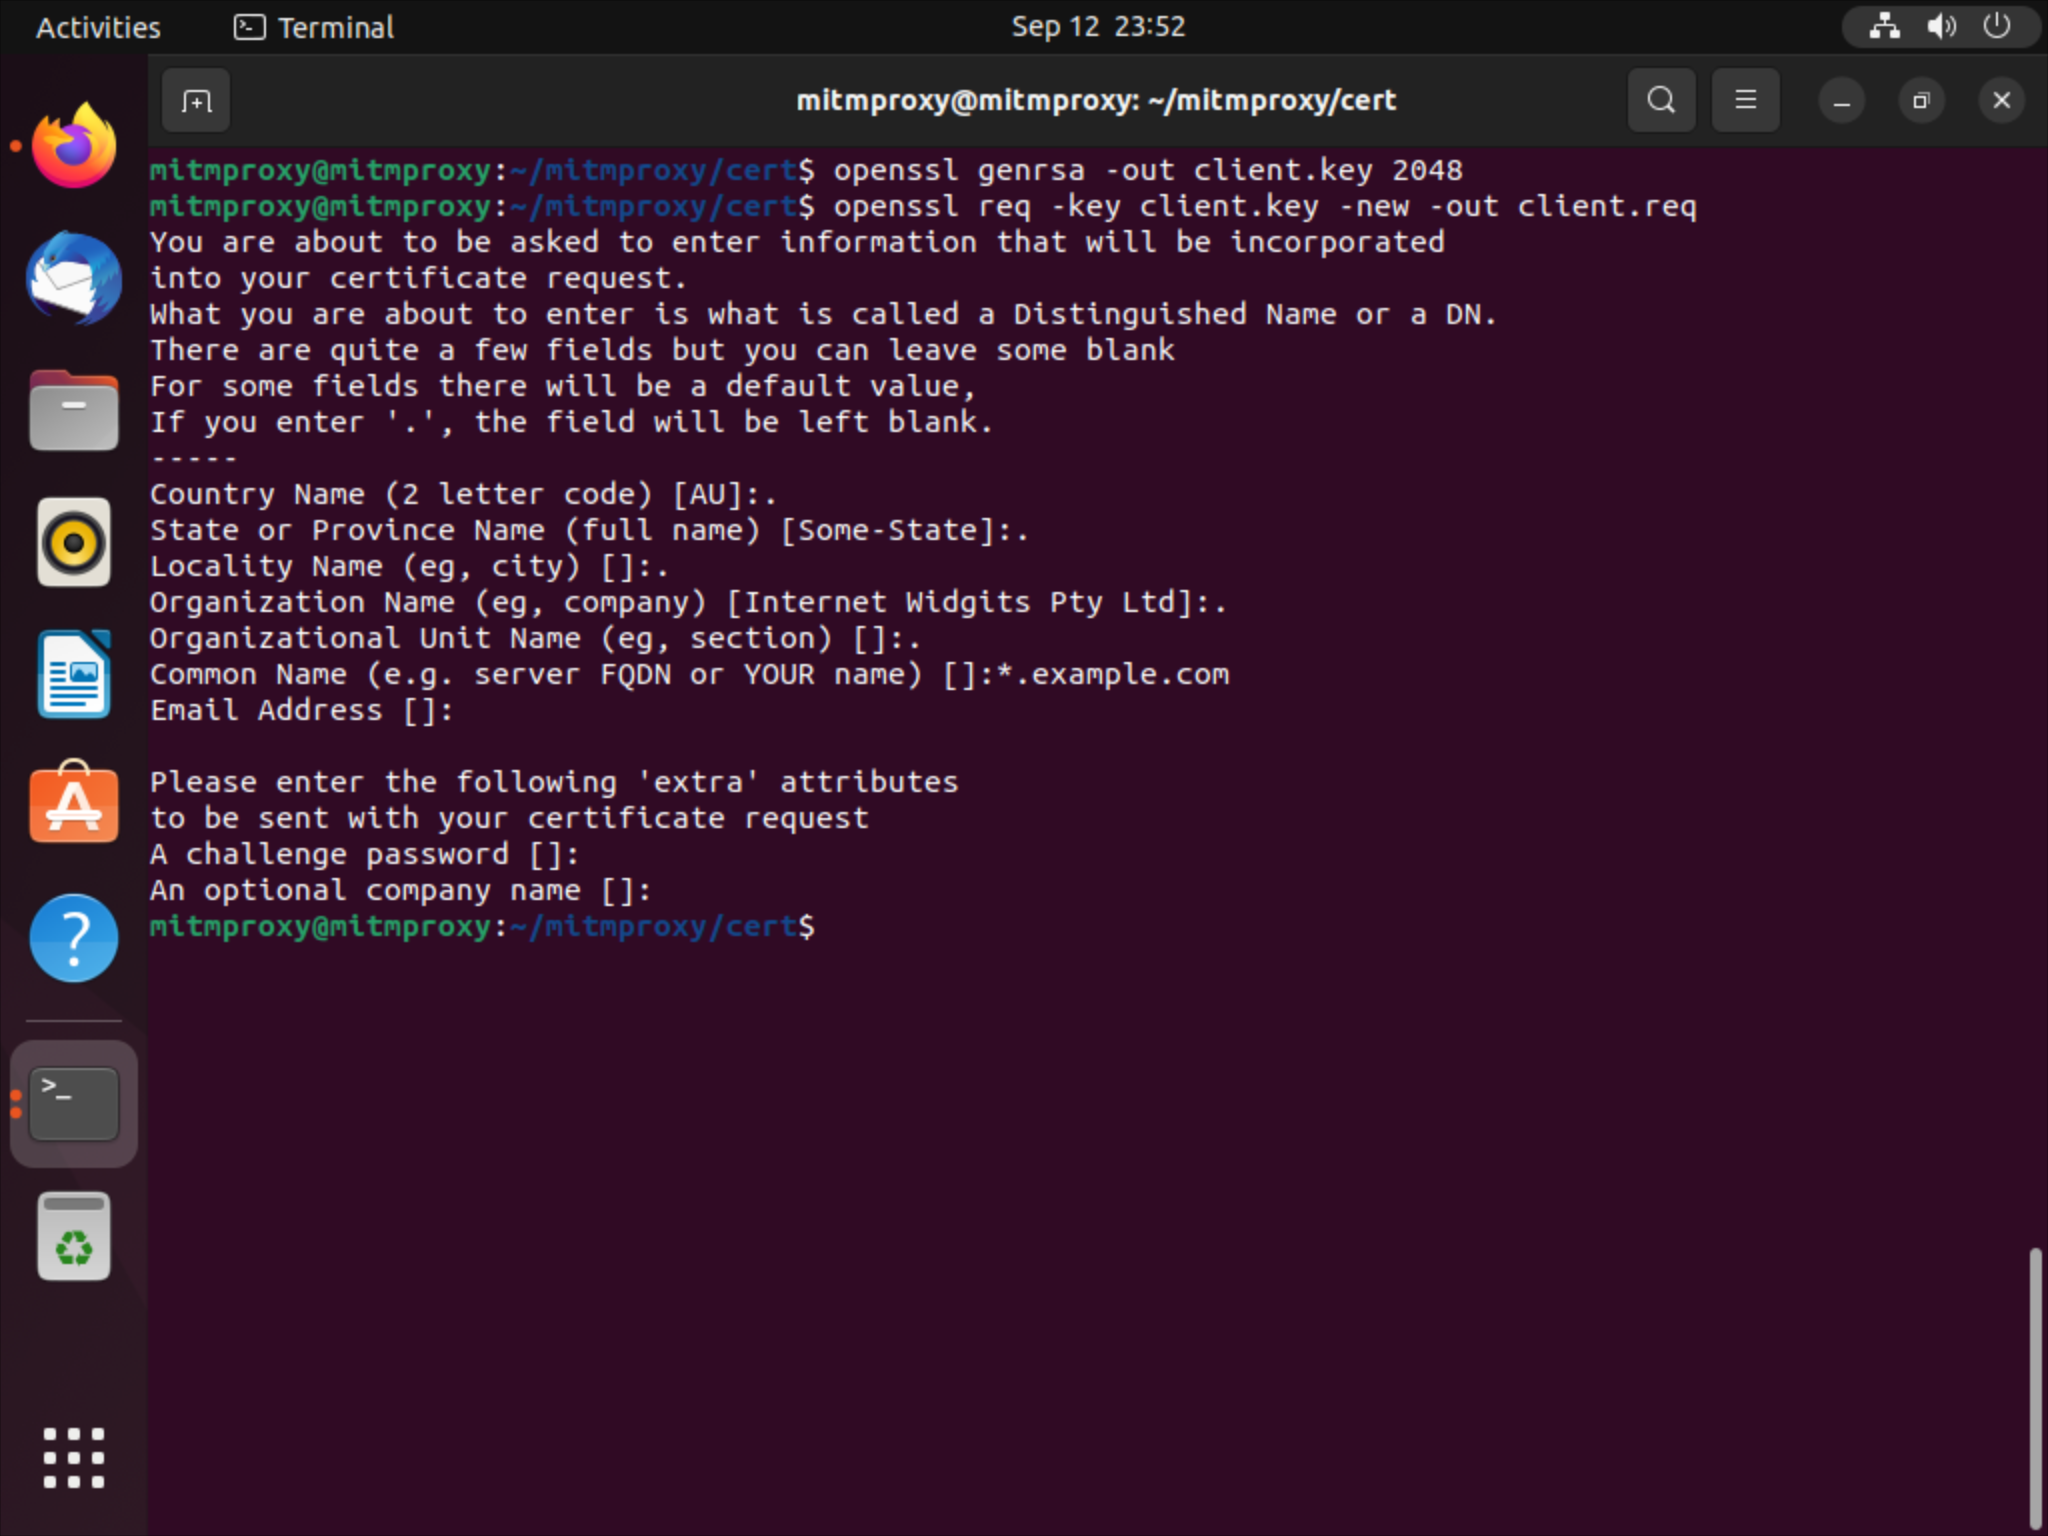
To do this, open up a new command prompt on the mitmproxy box; and make a new directory and a new certificate request.
mkdir ~/mitmproxy/cert
cd ~/mitmproxy/cert
# generate a key
openssl genrsa -out client.key 2048
# generate a certificate request
openssl req -key client.key -new -out client.req
For all other fields except the “Common Name”, you can just put in a dot which leaves it for blank. For “Common Name”, put the domain you want to issue the certificate for:
Then put the following in client.cnf:
[ ssl_client ]
basicConstraints = critical, CA:FALSE
extendedKeyUsage = serverAuth, clientAuth
keyUsage = critical, digitalSignature, keyEncipherment
subjectAltName = @alternate_names

[ alternate_names ]
DNS.1 = *.example.com
DNS.2 = example.com
Finally run the following to generate the request and sign the certificate with the mitmproxy root CA:
# sign the request
openssl x509 -req -in client.req -signkey client.key -out client.crt
# issue the certificate from the mitmproxy root ca
openssl x509 -req -days 365 -in client.req -CA ~/.mitmproxy/mitmproxy-ca.pem -CAkey ~/.mitmproxy/mitmproxy-ca.pem -set_serial 00001 -out client.crt -extfile client.cnf -extensions ssl_client
# write out just the cert (with key and the ca cert at the end)
cat client.key client.crt ~/.mitmproxy/mitmproxy-ca-cert.pem > full-client.pem
You can finally generate the sha256-pin values of both the root CA as well as the leaf certificate with the following commands:
# leaf cert = Jtgu08WNuuGbvZ81c/fI/xkccD6NjcIy4a/S/9mtOdk=
openssl x509 -in client.crt -pubkey -noout | openssl pkey -pubin -outform der | openssl dgst -sha256 -binary | openssl enc -base64
# root cert = QzzCzEWdoc66dta0KhWZ6w50YWI8Fy9oXQ2NQW8EBhs=
openssl x509 -in ~/.mitmproxy/mitmproxy-ca.pem -pubkey -noout | openssl pkey -pubin -outform der | openssl dgst -sha256 -binary | openssl enc -base64
# finally go back
cd ~/mitmproxy
Copy these values somewhere for the future.
You can now run mitmweb and tell it to use these certificates with the following command:
./mitmweb --mode transparent --certs *.example.com=cert/full-client.pem
Replacing the certificate pin hashes
The last step now is to replace the hashes returned in the first API call with these new hashes. mitmproxy is amazingly powerful because of its scriptability. So I wrote a small python script to do this:
from mitmproxy import http

def response(flow):
    if flow.response and flow.response.content:
        c = flow.response.content
        if b"tls_certificate_sha256_pins" in c:
            c = c.replace(b"v55lxgINs0A4/XURP5K8fTSewJc7S1CusvkOObVVNAQ=", b"Jtgu08WNuuGbvZ81c/fI/xkccD6NjcIy4a/S/9mtOdk=")
            c = c.replace(b"wOCUmHaXqao/7La+XijYP2yTZzspExLADro/tyifUKo=", b"QzzCzEWdoc66dta0KhWZ6w50YWI8Fy9oXQ2NQW8EBhs=")
        flow.response.content = c
I had to be careful to swap the leaf/root certificates the right way around.
Finally, I could ran mitmweb with both of these options (--quiet just supresses the annoying logging):
./mitmweb --mode transparent --certs *.example.com=cert/full-client.pem --quiet -s modify.py
I was incredibly surprised and excited to see the app accepting my certs and this getting around the certificate pinning!